What is a Chochin Obake?
Ever since living in Japan, I’ve wanted to bring a bit more of the Japanese spirit of Halloween into my decorations, and what better way to do that than by creating your own Haunted Japanese Lantern!
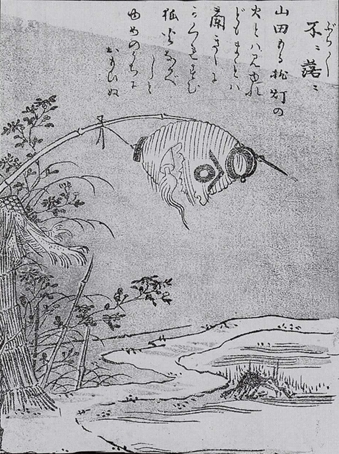
Also known as Chōchin Obake, this ghostly paper lantern belongs to the tsukumogami subcategory of yōkai, spirits that inhabit old or discarded tools and items. According to folklore, these objects gain a spirit after one hundred years, which explains the often tattered or imperfect appearance of such yōkai. Perfect inspiration for homemade crafts!
The professionally made Chōchin Obake you sometimes see around Halloween in Japan tend to look a bit too pristine, with their mouths neatly painted on. That’s not what we’re going for here, we’re tearing and distressing our chōchin to really capture the ghostly, haggard nature of the yōkai.
Chochin Obake Decoration DIY Guide
This guide is divided into two parts: the first covers how to prepare and work with the lantern itself (and where to get the materials), while the second explains how to crochet a nice big tongue for your decoration. If you can’t crochet, you can always substitute a paper tongue instead.
What you will need:
- 1 x Japanese style lantern
- 1 x 10cm lampshade adapter
- 1 x White primer
- 1 x Black Primer
- 2 x A4 Cardboard
- Cutting Board
- Crochet hook 6mm
- Stitch marker
- Chunky weight red yarn (approximately 30 to 40 m)
- DK weight pink yarn 60cm
- Wire 120 cm
- Stuffing
- Japanese Lantern
- Socket
It’s up to you where you source your lantern and lampshade adapter, but I found the most cost-effective way was to order them from Aliexpress or Ebay. The lampshade adapter came in a pack of two, which makes it easy to prepare to make a large batch of your DIY Japanese Halloween decorations!
Step One – Cutting the Mouth
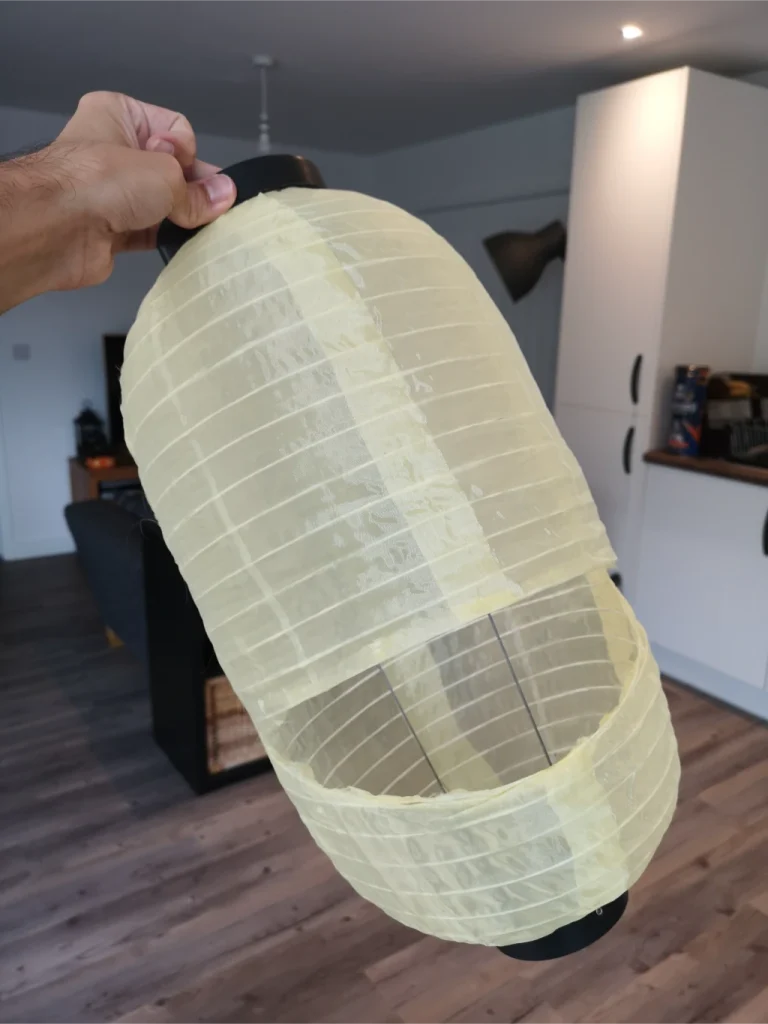
First, grab your Japanese lantern and assemble it using the metal wire provided so that it extents to its full shape.
Assembling the lantern first is important because it helps you decide where to place the mouth and eyes.
For my design, I cut between the 7th and 8th rings from the bottom of the lantern, going around one third of the way up from the bottom to form the mouth. Use your judgment here, as ring spacing may vary.
Also, note how the fabric overlaps itself in some areas. You can see in the photo that it is doubled over in places. I chose to cut up to where these overlaps meet because this area is toughest and helps prevent accidental tearing over time. After all, I want this decoration to last every Halloween!
Additionally I chose to glue down some of the loose fabric around the mouth to give it a slightly tidier appearance, but of course, this is entirely up to you!
Step Two – Preparing the Eye Templates
Now it’s time to give your lantern a nice, unsettling eyeball! You’ll only need two colours of spray paint for this step. I went with Citadel Colour Primers, Chaos Black and Wraith Bone, but honestly, any spray paints you’ve got in the shed will do the trick.
Before painting, grab two sheets of cardboard to sketch your template. The secret here is bendable cardboard, something like that flexible packaging sheet you get with Amazon deliveries. You’ll want it to curve smoothly over the lantern’s surface later.
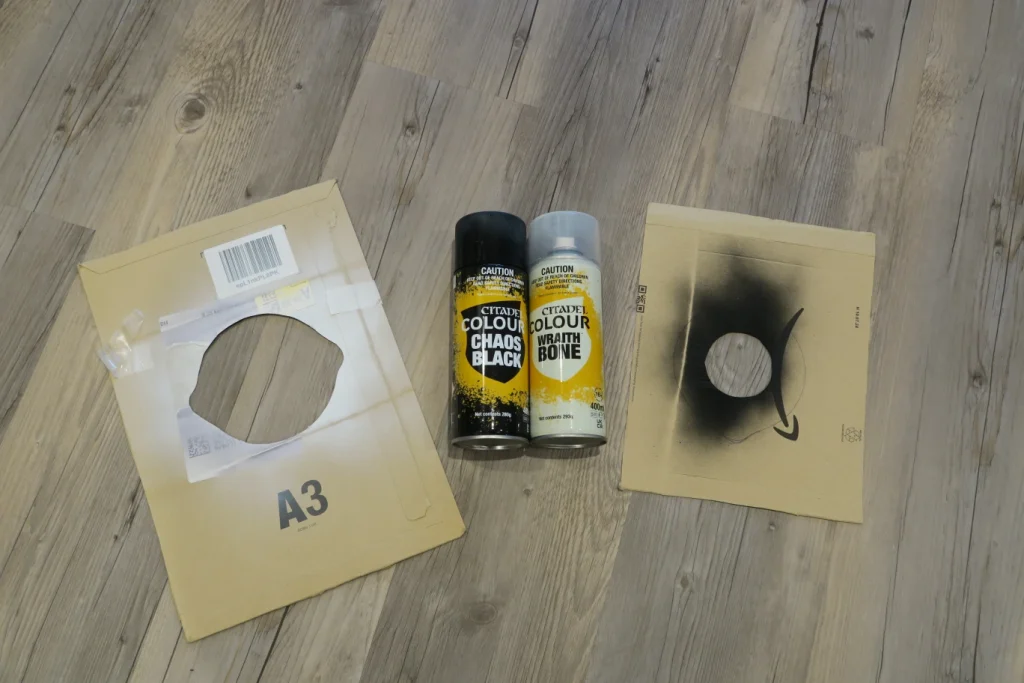
Start with your first piece and cut out a circular hole about 12cm across. I actually used the base of a small watering can as my guide (use whatever round household object fits the bill!) and traced around it with a pen. Once you’ve got the basic circle, shape it slightly at the sides so the eye looks more natural, a little less “perfect circle,” a little more “watching you from the shadows”.
Now grab your second piece of cardboard and repeat the process, but this time go for a circle about half the size of the first, roughly 6cm in my case. I used the bottom of a cup for this one. Once both circles are traced, carefully cut them out with a craft knife. Pop your cardboard onto a self-healing cutting mat (or a sacrificial bit of thick packaging) before you start slicing. We’re going for spooky eyes here, not extra holes in the table!
Step Three – Spraying the Eye
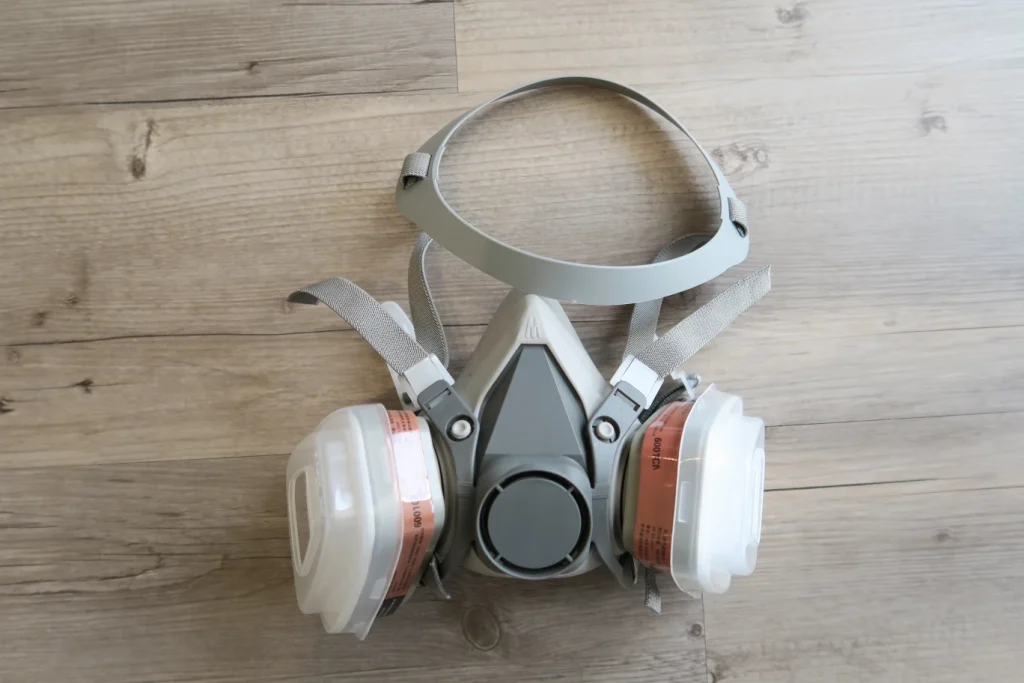
I know, I know, safety talk isn’t the most thrilling part, but trust me, this one’s worth it. Before you start spraying, pop on a mask! Spray paints contain particles you really don’t want to inhale. Your lungs will thank you. Also, make sure that you do this either outside or with plenty of ventilation!
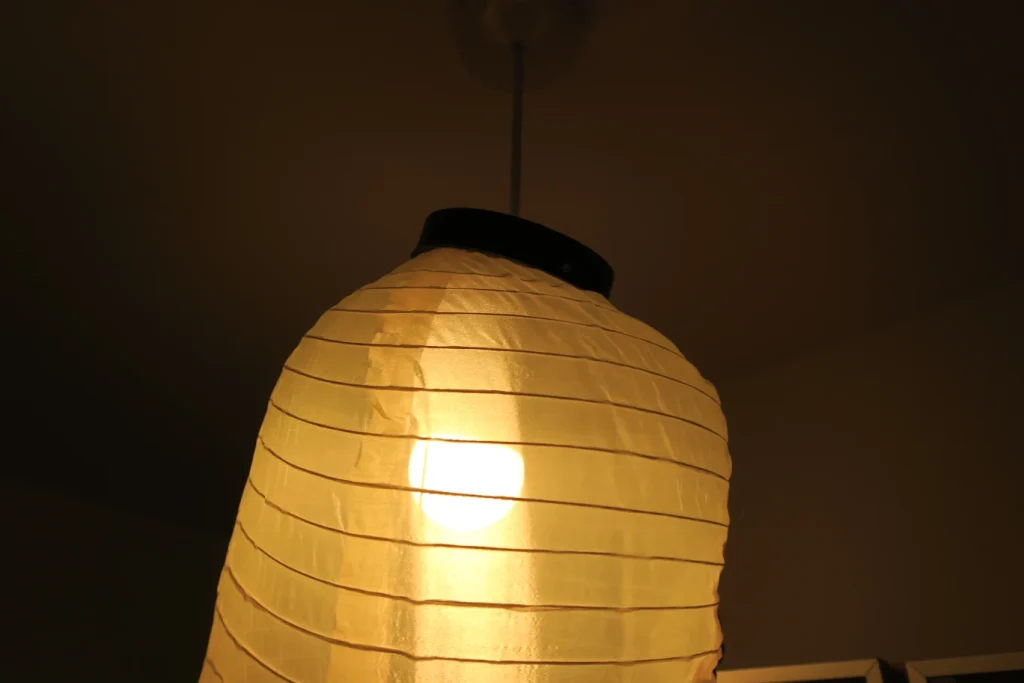
Now grab your 12cm template and position it over the lantern’s face, lining it up with the mouth you cut earlier. Once you’re happy with the placement, secure it with two elastic bands, one near the top and one at the bottom. When it’s snug and ready, give it a nice, even coat of white spray. Then let it dry for about 10 minutes before moving on to the next step.
Once your white base is dry, it’s time to bring the spooky eye to life with the smaller template. Repeat the same routine, line it up carefully on the lantern’s face and make sure the “pupil” is perfectly centered, then, hit it with a black spray coat to finish the eyeball.
Step Four – Creating the Chochin Obake Tongue
When it comes to Chochin Obake, if your lantern is cream-coloured, the tongue should typically be red, but if you’re rocking an orange or red lantern, purple is the way to go.
Now, full disclosure: I have zero clue how to crochet a tongue myself, so I called in the expert help of Erina, who whipped one up beautifully! That means the rest of this section is pretty much a crochet pattern.
Abbreviations
St – stitch
Mr – magic ring
Sc – Single stitch
Inc – increase
Slst – slip stitch
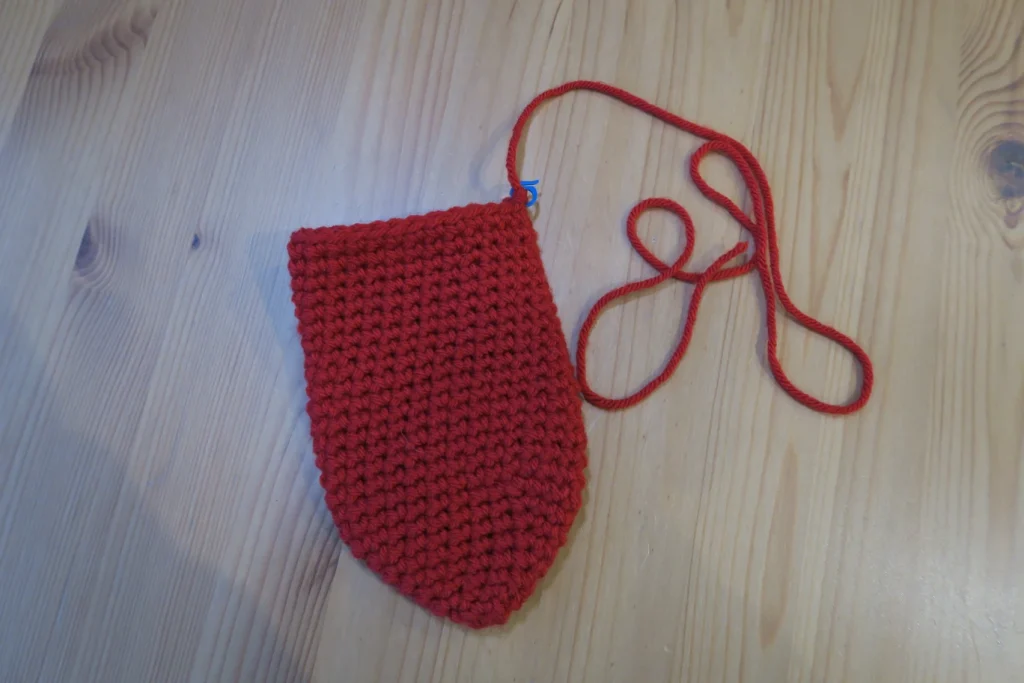
Tongue
Row 1 – 6sc mr (6st ) * It’s easer to use stitch marker at the end of each row.
Row 2 – (Sc, inc) x 3 times (9st)
Row 3 – (2Sc, inc) x 3 times (12st)
Row 4 – (3Sc, inc) x 3 times (15st)
Row 5 – (4Sc, inc) x 3 times (18 st)
Row 6 – (5Sc, inc) x 3 times (21st)
Row 7 – (6Sc, inc) x 3 times (24 st)
Row 8 – (7Sc, inc) x 3 times (27st)
Row 9 – Row 26 – Sc all (27st)
Slst to fasten off, leaving a tail approximately double the circumference for to saw up in the end.
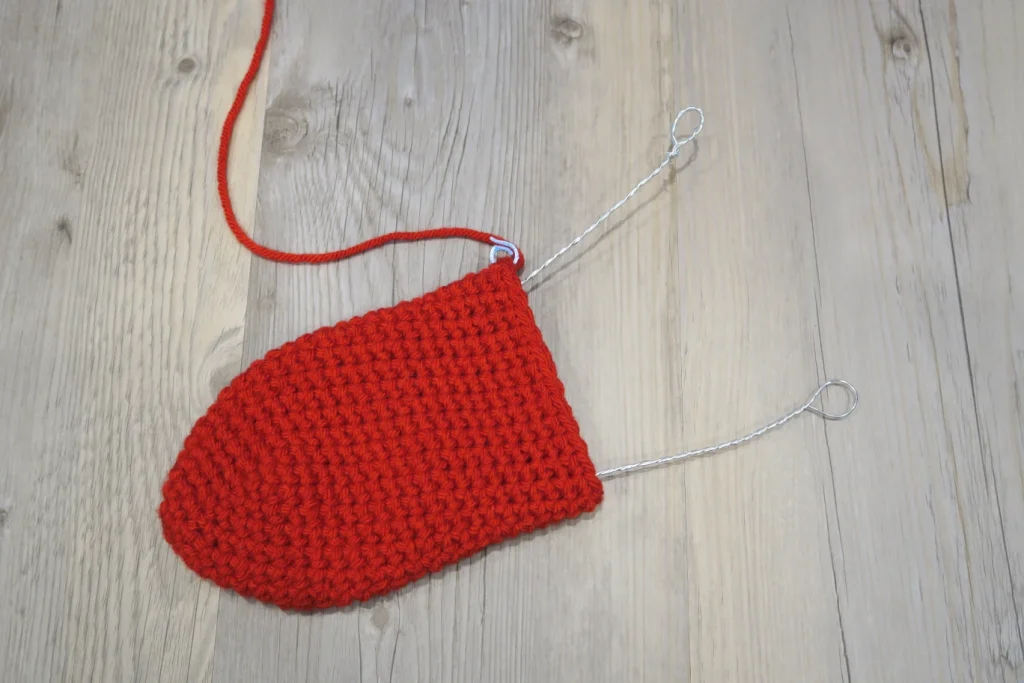
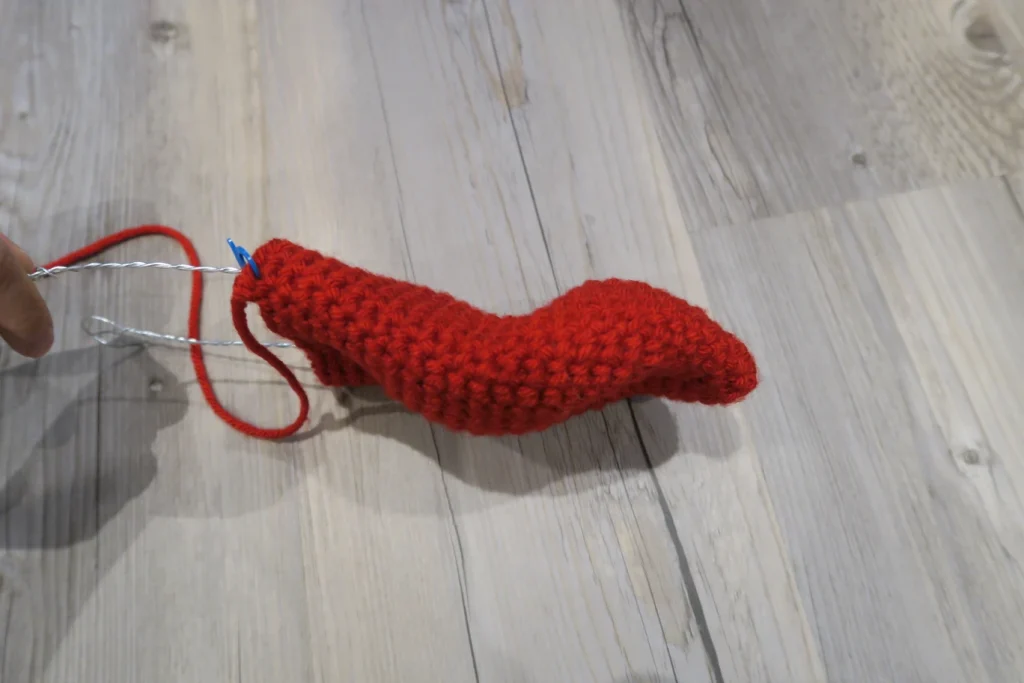
Cut the wire 120cm, and twist it making stronger. Insert the wire inside the tongue to check if the wire is strong enough to be able to bend the tongue in to a shape like the picture.
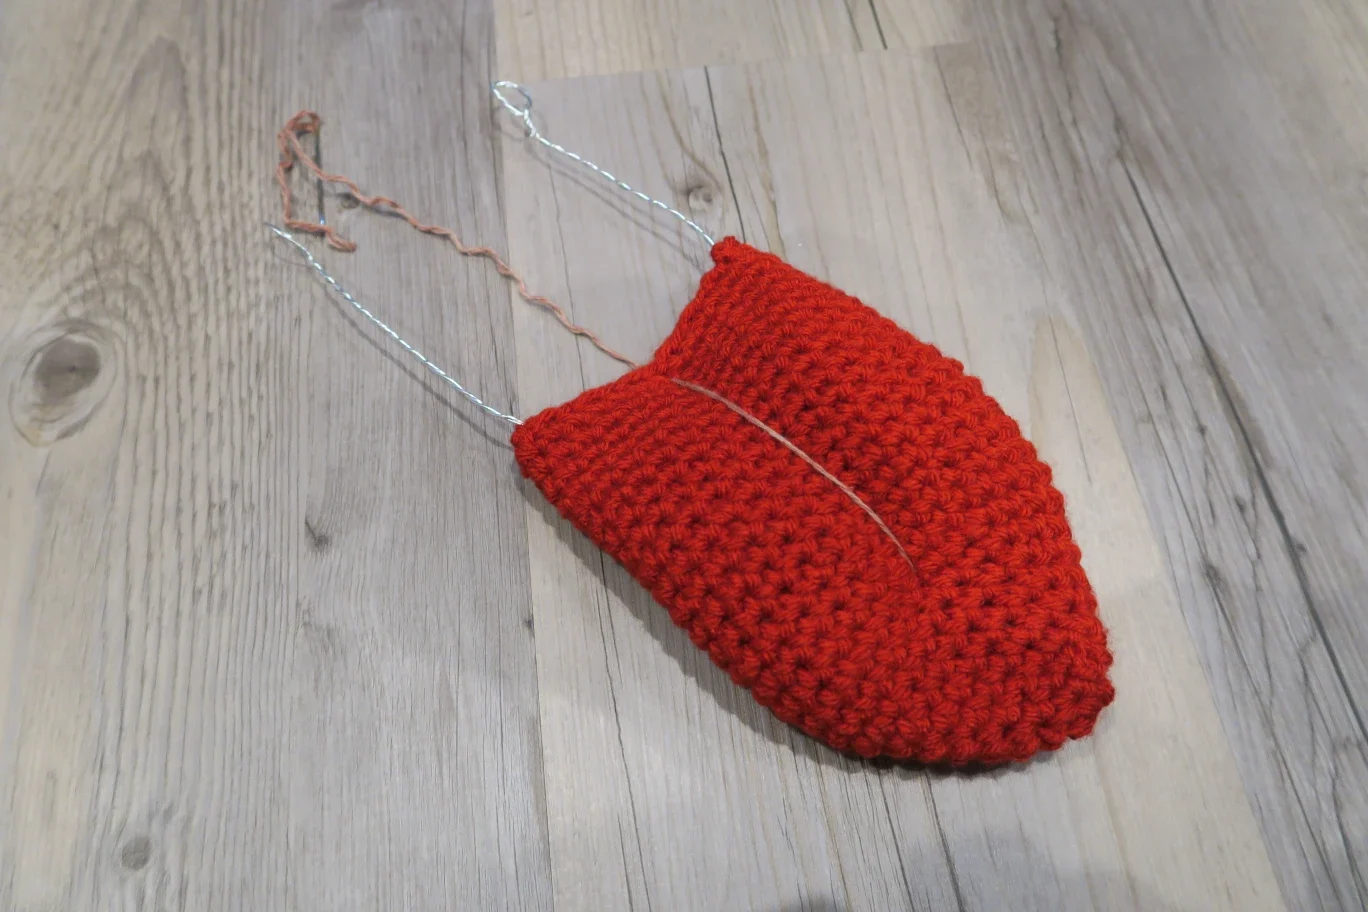
Put stuffing in the tongue thickness is about 1.5 cm to 2 cm, see on the picture, then saw up the top of the tongue. Use a tapestry needle and 60cm of pink yarn to make the centre line of the tongue 60cm of pink yarn, fasten tightly on the back of the tongue.

Step Five – Fitting the Tongue
Now that your crocheted tongue is all done and looking delightfully creepy, it’s time to piece your spooky lantern puzzle together.
Take the wires poking out of the back of the tongue and tie them securely around the wire loop in the middle of your Chochin Obake; this keeps the tongue fully extended and ready to frighten.
How your tongue hangs is totally up to you! If it feels like the mouth is being stretched a bit too much, don’t worry, just go back and carefully remove some of the filling from the tongue to lighten things up.
If you’re just planning to hang your ghastly lantern outside, congratulations, you’re all done! But if you want to crank up the creep factor and use this bad boy indoors with your household lights, keep one how to use it as a lampshade indoors.

Step Five (Optional) – Lampshade Adapter
We’ve made it to the grand finale! While this step is technically optional, it’s highly recommended if you want to dial your spooky lantern up to full Japanese horror vibes. Time to fit the lampshade adapter to the top of your Haunted Japanese Lantern masterpiece. Following the pictures will really help here.
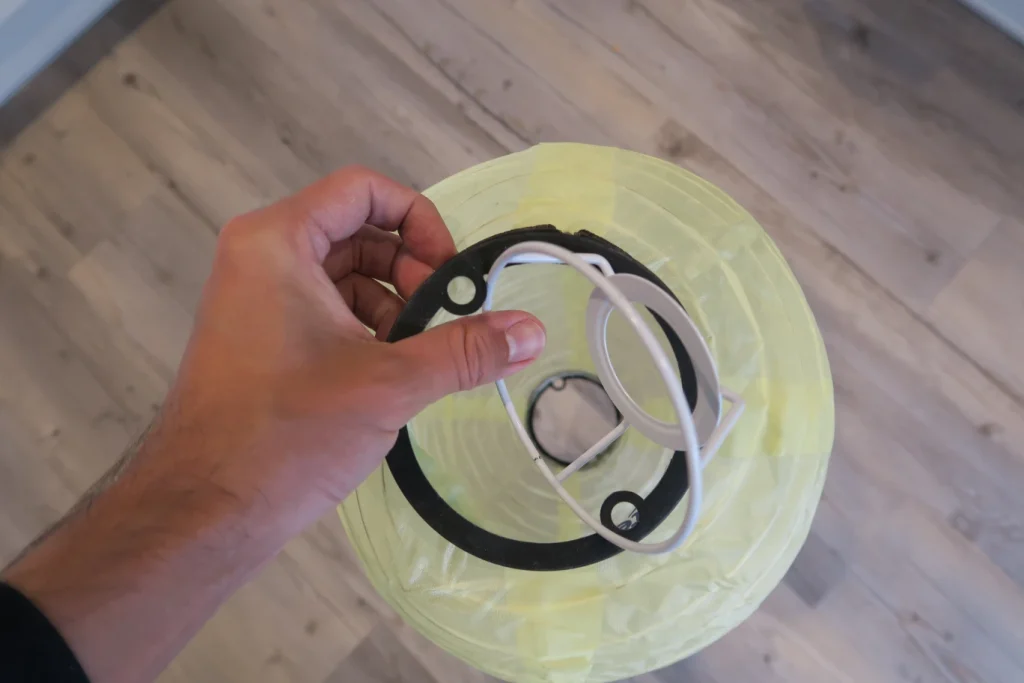
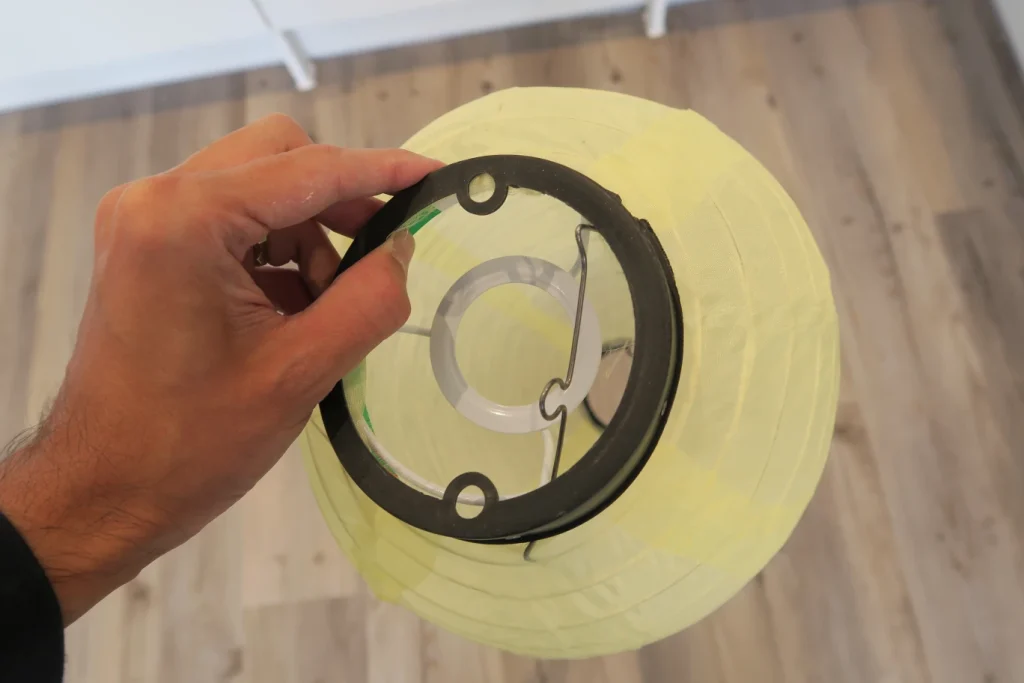
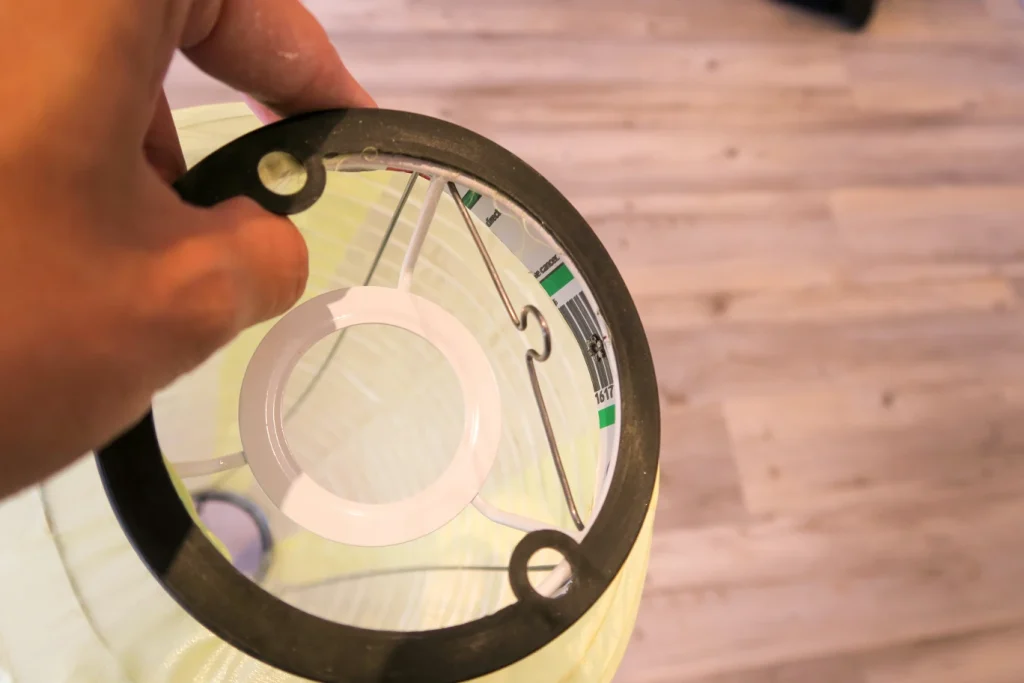
Start by gently pushing your lampshade adapter through the lantern’s top. You’ll notice the plastic has just enough give to let you wiggle it through. Once it’s in, press it flat against the top to make sure everything fits snugly; we want this ghostly creation solid, not slipping!
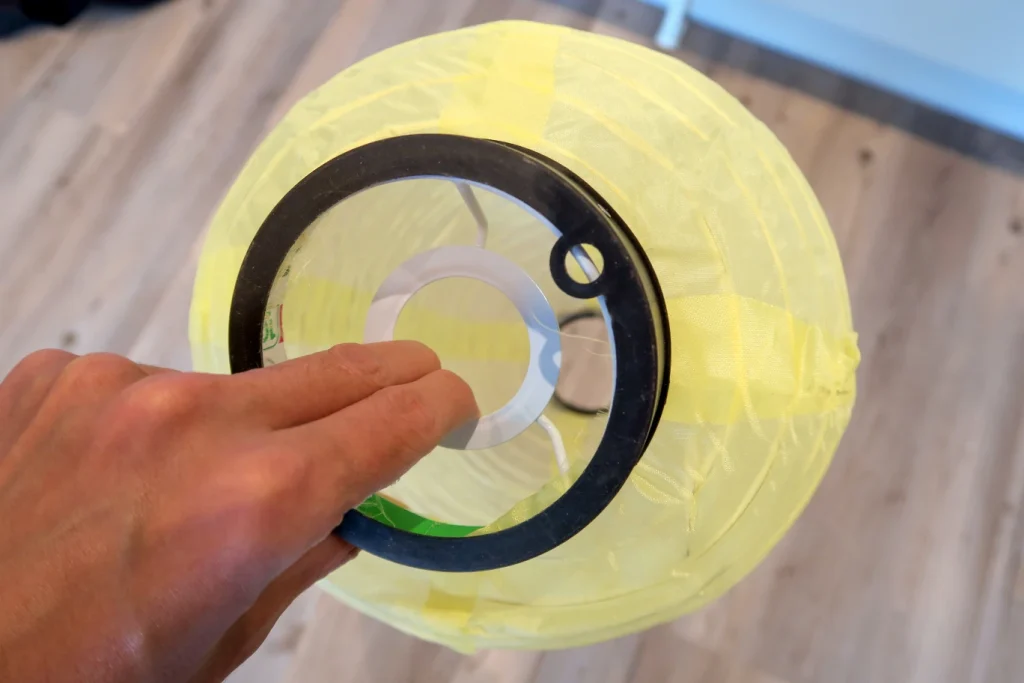
Next up, nudge that lampshade adapter to one side, because now you’ll need to re-fit the wire that holds your Chochin Obake together. This part’s a bit fiddly. Instead of using the usual holes to keep the wire in place, guide the wire so it bends away from the mouth.
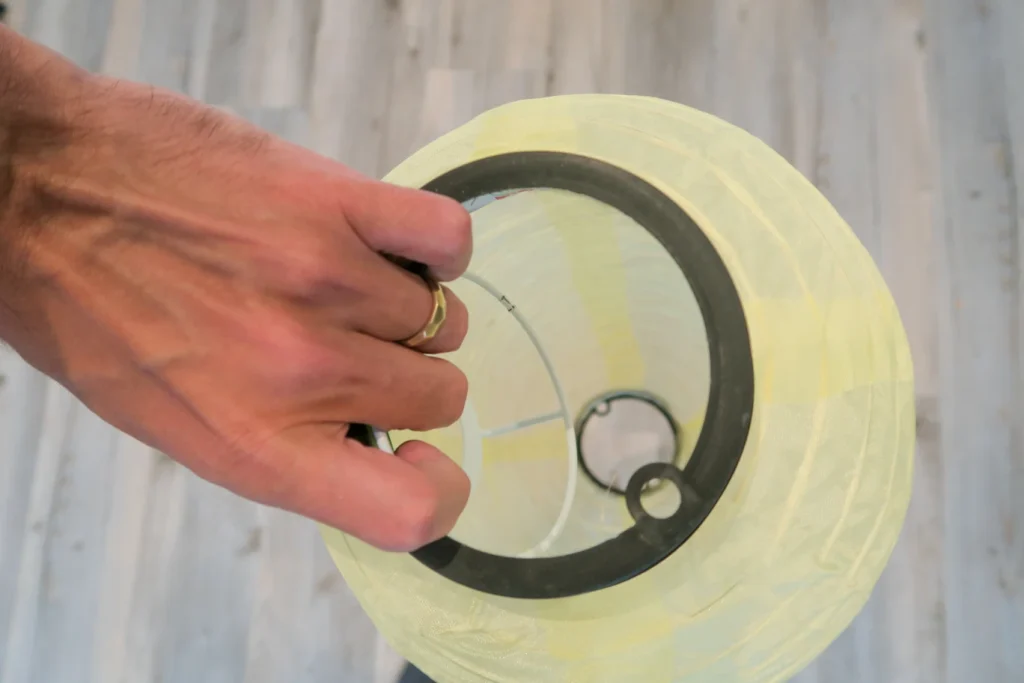
As you can see, it’s an awkward fit, so we’re going to have to bend that wire until it’s tucked just right. The trick is to keep the wire below the adapter, letting a little pressure hold the adapter steady. A tiny dab of superglue on the adapter will lock everything securely in place. But don’t glue the lantern wire, as one of the best things about this decoration is that it’s easy to disassemble and put in to storage until next year!
Bonus: Bending the wire like this actually gives your lantern a bit of a forehead. Suddenly, your yokai decoration has a bit of stylish face shaping! If you notice the whole thing leans at a funny angle, don’t sweat it; once the tongue is attached, its weight will balance everything out.
Finale
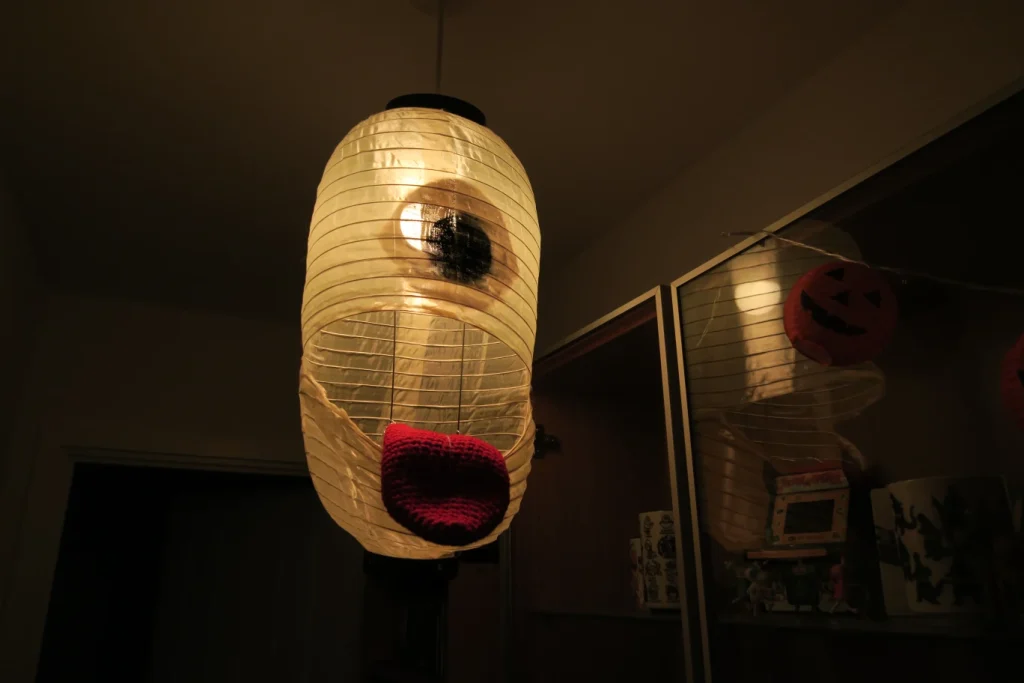
And there you have it! Your very own Haunted Japanese Lantern, the perfect spooky decoration to add that extra eerie charm to your Japanese Halloween decoration setup! With a blend of traditional yokai inspiration and crafty creativity, this lantern is sure to capture attention and spark conversations. If you really want to take the creepiness to the next level, try using a Philips Hue Colour lightbulb or any similar Wi-Fi-controlled light. You can dim the lantern’s glow and change its colour on a whim, creating an even more haunting and creative atmosphere for your spooky celebrations.
Whether you hang it outside to greet trick-or-treaters or use it indoors to cast creepy shadows alongside your household lights, this unique Chochin Obake-inspired decoration brings a touch of Japanese folklore right to your doorstep.
And since Study Japanese (as you can tell from the name),is primarily a Japanese language blog, if you are studying Japanese, give our Japanese textbook archive a look! Alternatively, if you’re looking for Japanese lessons, feel free to reach out.
Happy crafting, and may your Halloween be filled with spooky fun and creative flair!